Nearly all yoga poses are hip-openers, and if we treated them that way, our practice could offer us so much more. We’ll now turn our biomechanical eye to how you can shift your alignment to truly open your hips in your practice!
http://yogadork.com/2014/04/07/lets-forget-about-hip-openers-part-2/ – Jenni Rawlings
Welcome to Part 2 of my hip-opening article! In Part 1 we looked at how classifying a small, specific group of yoga poses as “hip-openers” overlooks the anatomical fact that nearly all yoga poses are hip-openers, and if we treated them that way, our practice could offer us so much more. We’ll now turn our biomechanical eye to how you can shift your alignment to truly open your hips in your practice!
How to Open Your Hips (Really)
Let’s take pigeon pose. Single-leg pigeon pose is what most yogis picture when it comes to hip-opening (although we now know that there are a multitude of other poses which open the hips as well). This is a tricky pose because it requires a range of motion in the front hip that most people don’t actually have. In order to move into the shape, we often unknowingly destabilize other joints (especially the front knee), which is just a lame situation that no one wants. In order to effectively open our hip in this pose, without putting other body parts at risk, most of us will have to prop our front thigh up very high – but few people actually do this.
I think I’ll elaborate on this whole topic in a separate blog post, but for now, I’ll just offer that full lying face-down single-leg pigeon pose isn’t a great hip opener for most chair-sitting bodies. For truly effective and non-joint-damaging hip-opening I’d recommend other stretches instead, like the awesome reclined pigeon pose.
Reclined pigeon stretches a few muscles in the back of the hip, but let’s focus on just one of its main target muscles to keep things simple: the infamously tight piriformis.

In order to stretch a muscle, the distance between the muscle’s attachment points must increase. Most people simply don’t understand how to truly move a muscle’s attachment points away from each other (I didn’t fully comprehend this myself until I studied with my biomechanics teacher, guys!) and they, therefore, end up completely bypassing their intended stretch, stretching inappropriate tissue instead.
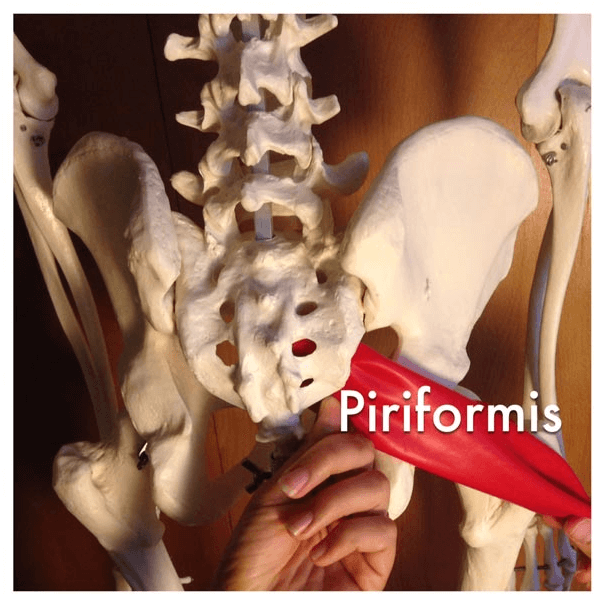
The pear-shaped piriformis attaches from the front of your sacrum, which is part of your pelvis, to a prominence on the femur called the greater trochanter. In order for this muscle to stretch, the pelvis and femur must move away from each other, which means that your pelvis must be un-tucked. If your pelvis stays tucked when you’re stretching your piriformis, your pelvis and femur have moved as a unit as opposed to moving away from each other, which means that a stretch didn’t happen in the place you thought it did. I’m not exaggerating when I say that 99% of the yogis I see stretch their piriformis this way, which means they’re not stretching their hip at all. (Sad face!)
Here’s a quick review of a tucked vs. un-tucked pelvis. In the un-tucked photo, note the presence of the natural inward curve of the lumbar spine/low back.

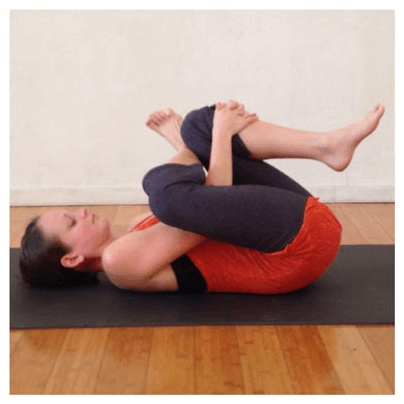
The below photo demonstrates the way most yogis do reclined pigeon. Knowing what we know about how to spot an un-tucked vs. tucked pelvis, can you see that in this pose, the pelvis is tucked, and instead of the natural inward curve of the lumbar spine, you see a lumbar spine that is rounded outward? There is no piriformis stretch happening in this pose at all because this muscle’s attachment points are not moving away from each other. Instead, the whole pelvis is tipped backward, resulting in an unintended stretch to the low back and a piriformis that unhappily kept its same old short length.

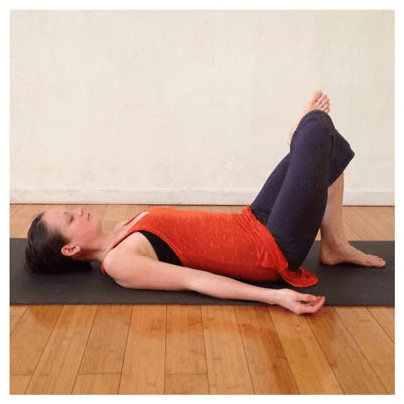
In this photo, however, you can see that Anna has backed off the shape by not pulling her thigh in toward her chest, which has allowed her pelvis to remain un-tucked. Now all she needs to do is maintain the un-tuck and maybe move her pigeon leg knee away from her a bit to actually create a stretch in her hip.

Although the pose in this second photo might not look as “deep” as the first one, if you train your eyes to actually see what the bones are doing in a stretch, you should see that this arrangement is the only version in which the hip is actually stretching. (For the record, Anna is actually quite flexible, and she and a small percentage of flexi-types might be able to pull their thigh in a bit closer to their body and still keep an un-tucked pelvis, but no one should pull their thigh in as close as the first photo. To keep an aligned pelvis, your tailbone needs to stay firmly planted on the ground. Your thigh can pull in a bit as long as your tailbone keeps contact with the ground. Make sense?)
Other Poses
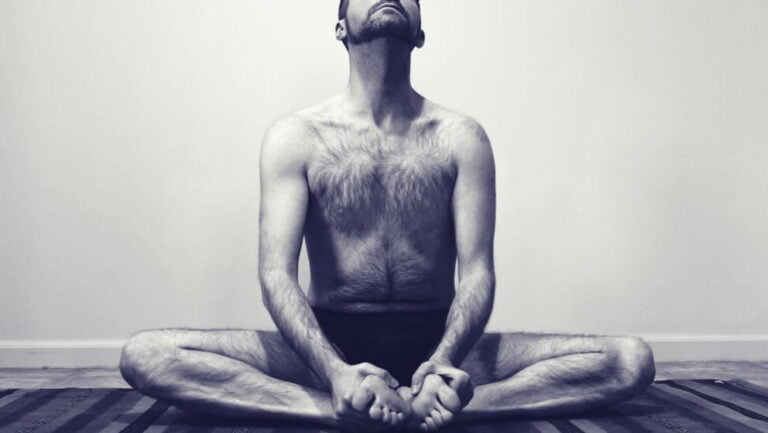
There are so many other poses which can open our hips, but to cover this topic in full is too big a job for this little old blog post. All hamstring stretches are hip-openers, all seated yoga poses are also hip-openers, all backbends are hip openers, all standing poses are hip-openers – the list is practically endless! Your whole yoga practice can become a hip-opening practice if you can see these poses for what they’re actually offering to your body.
Biomechanics and anatomy offer a profound understanding of the body and what our yoga practice is offering to us. As a progressive yoga teacher, my hope is to bring the clarity of this biomechanical perspective to the way we practice yoga so that we can move toward living in our bodies in a truly mindful way. I invite you to forget about “hip-openers” and to start thinking about aligning your body with integrity so that you can turn your whole yoga practice into the hip-opening experience that it’s meant to be!

